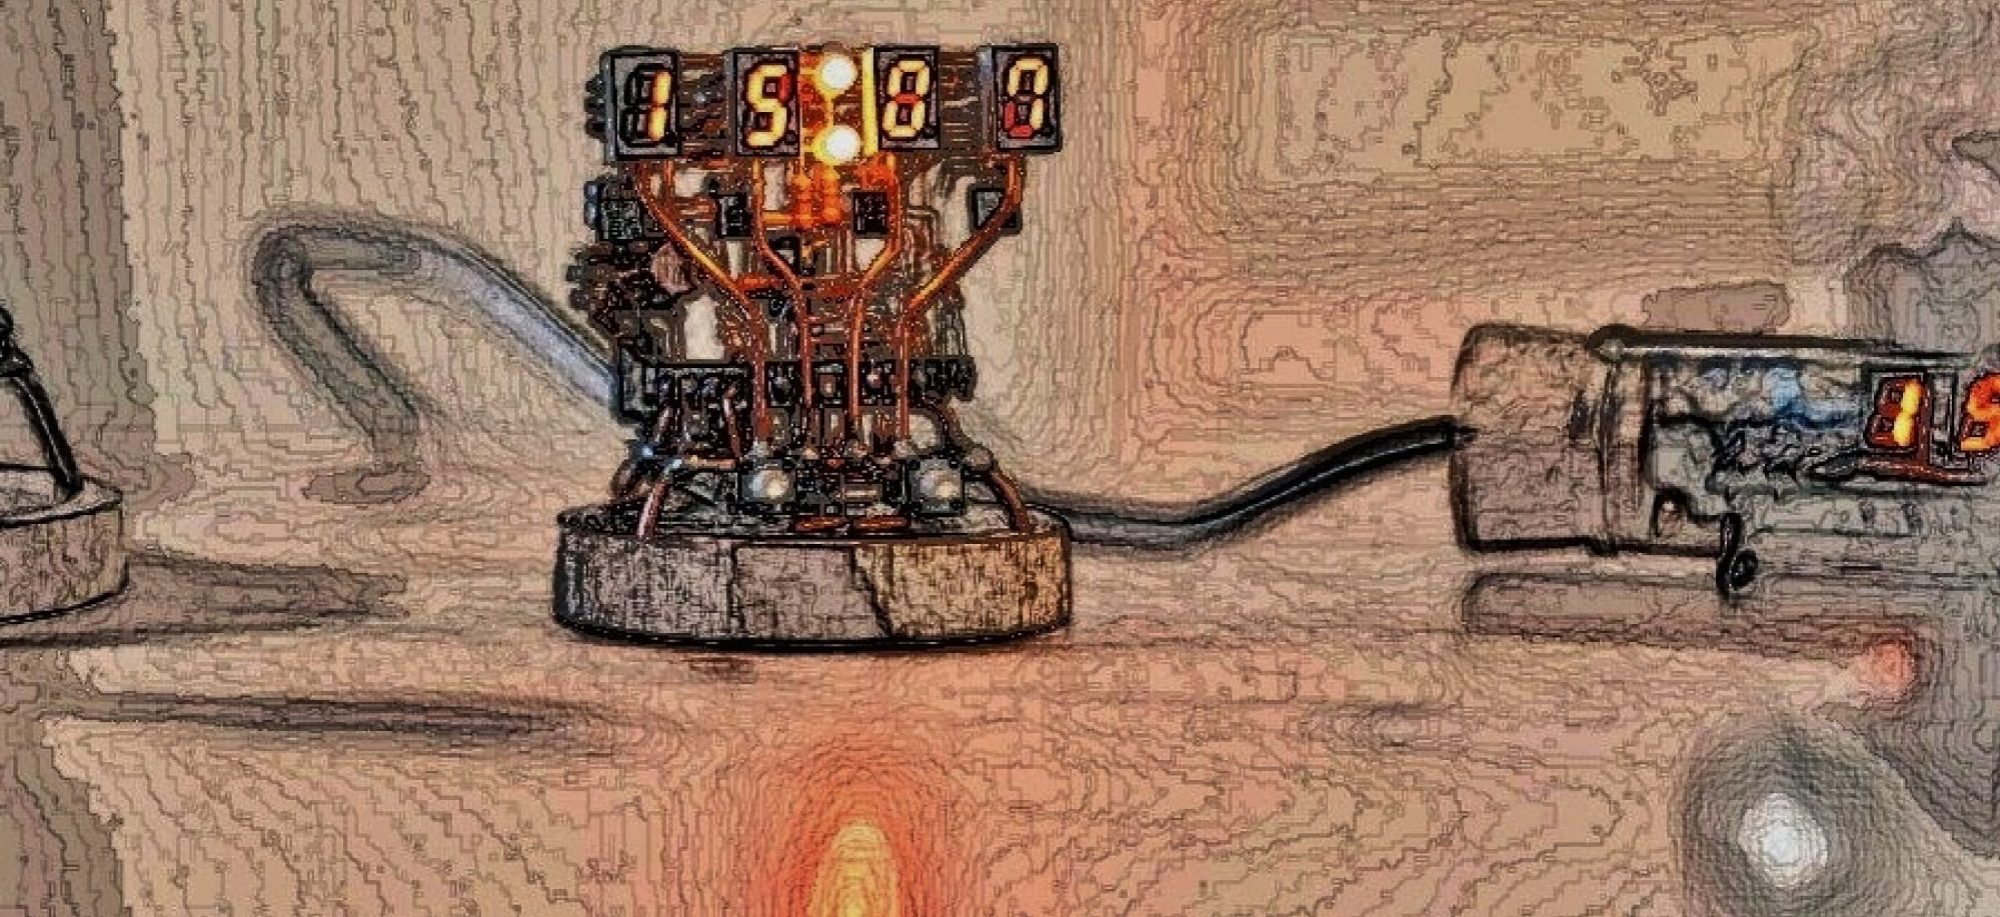

I wrote a bootloader for ATmega328 in my previous blog.
This time, as a continuation of this, I will write a program on ATmega328 like Arduino.
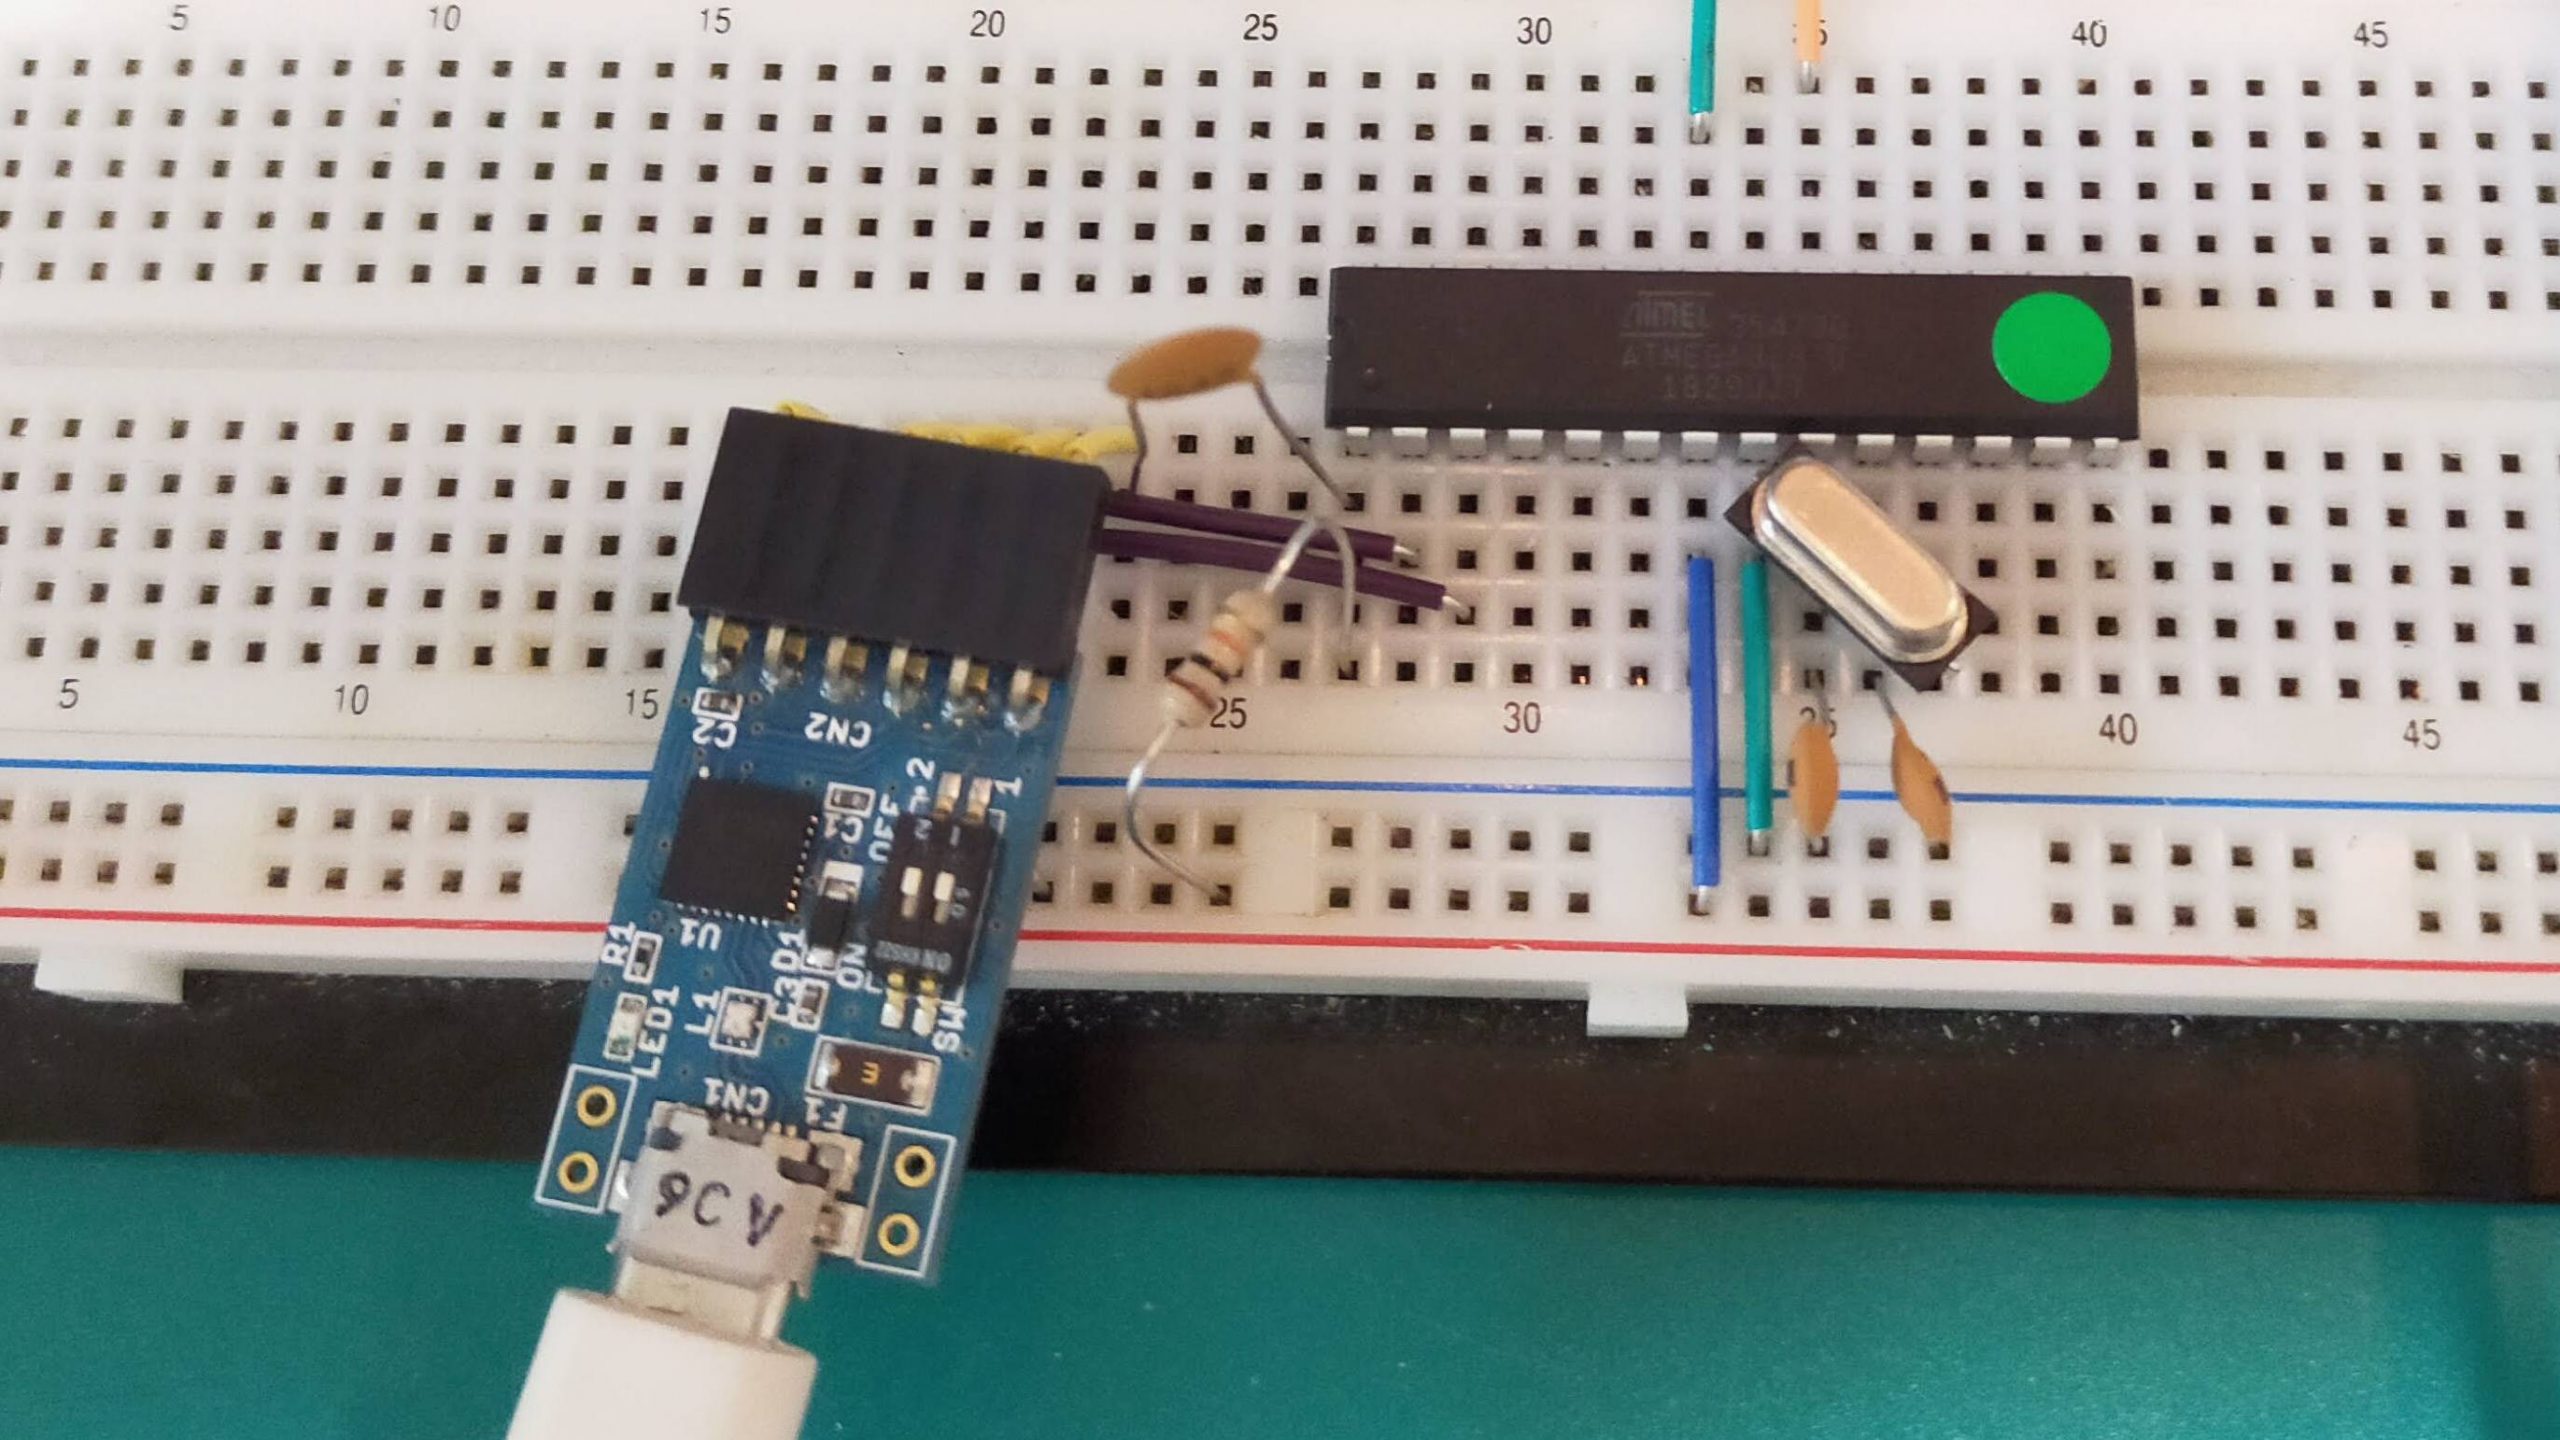
First of all, you need to connect to a PC to write the program. However, the ATmega328 does not have USB.
Well, I think I will prepare a genuine Arduino again, but a cheaper one can be used instead.
That is the USB-serial converter.


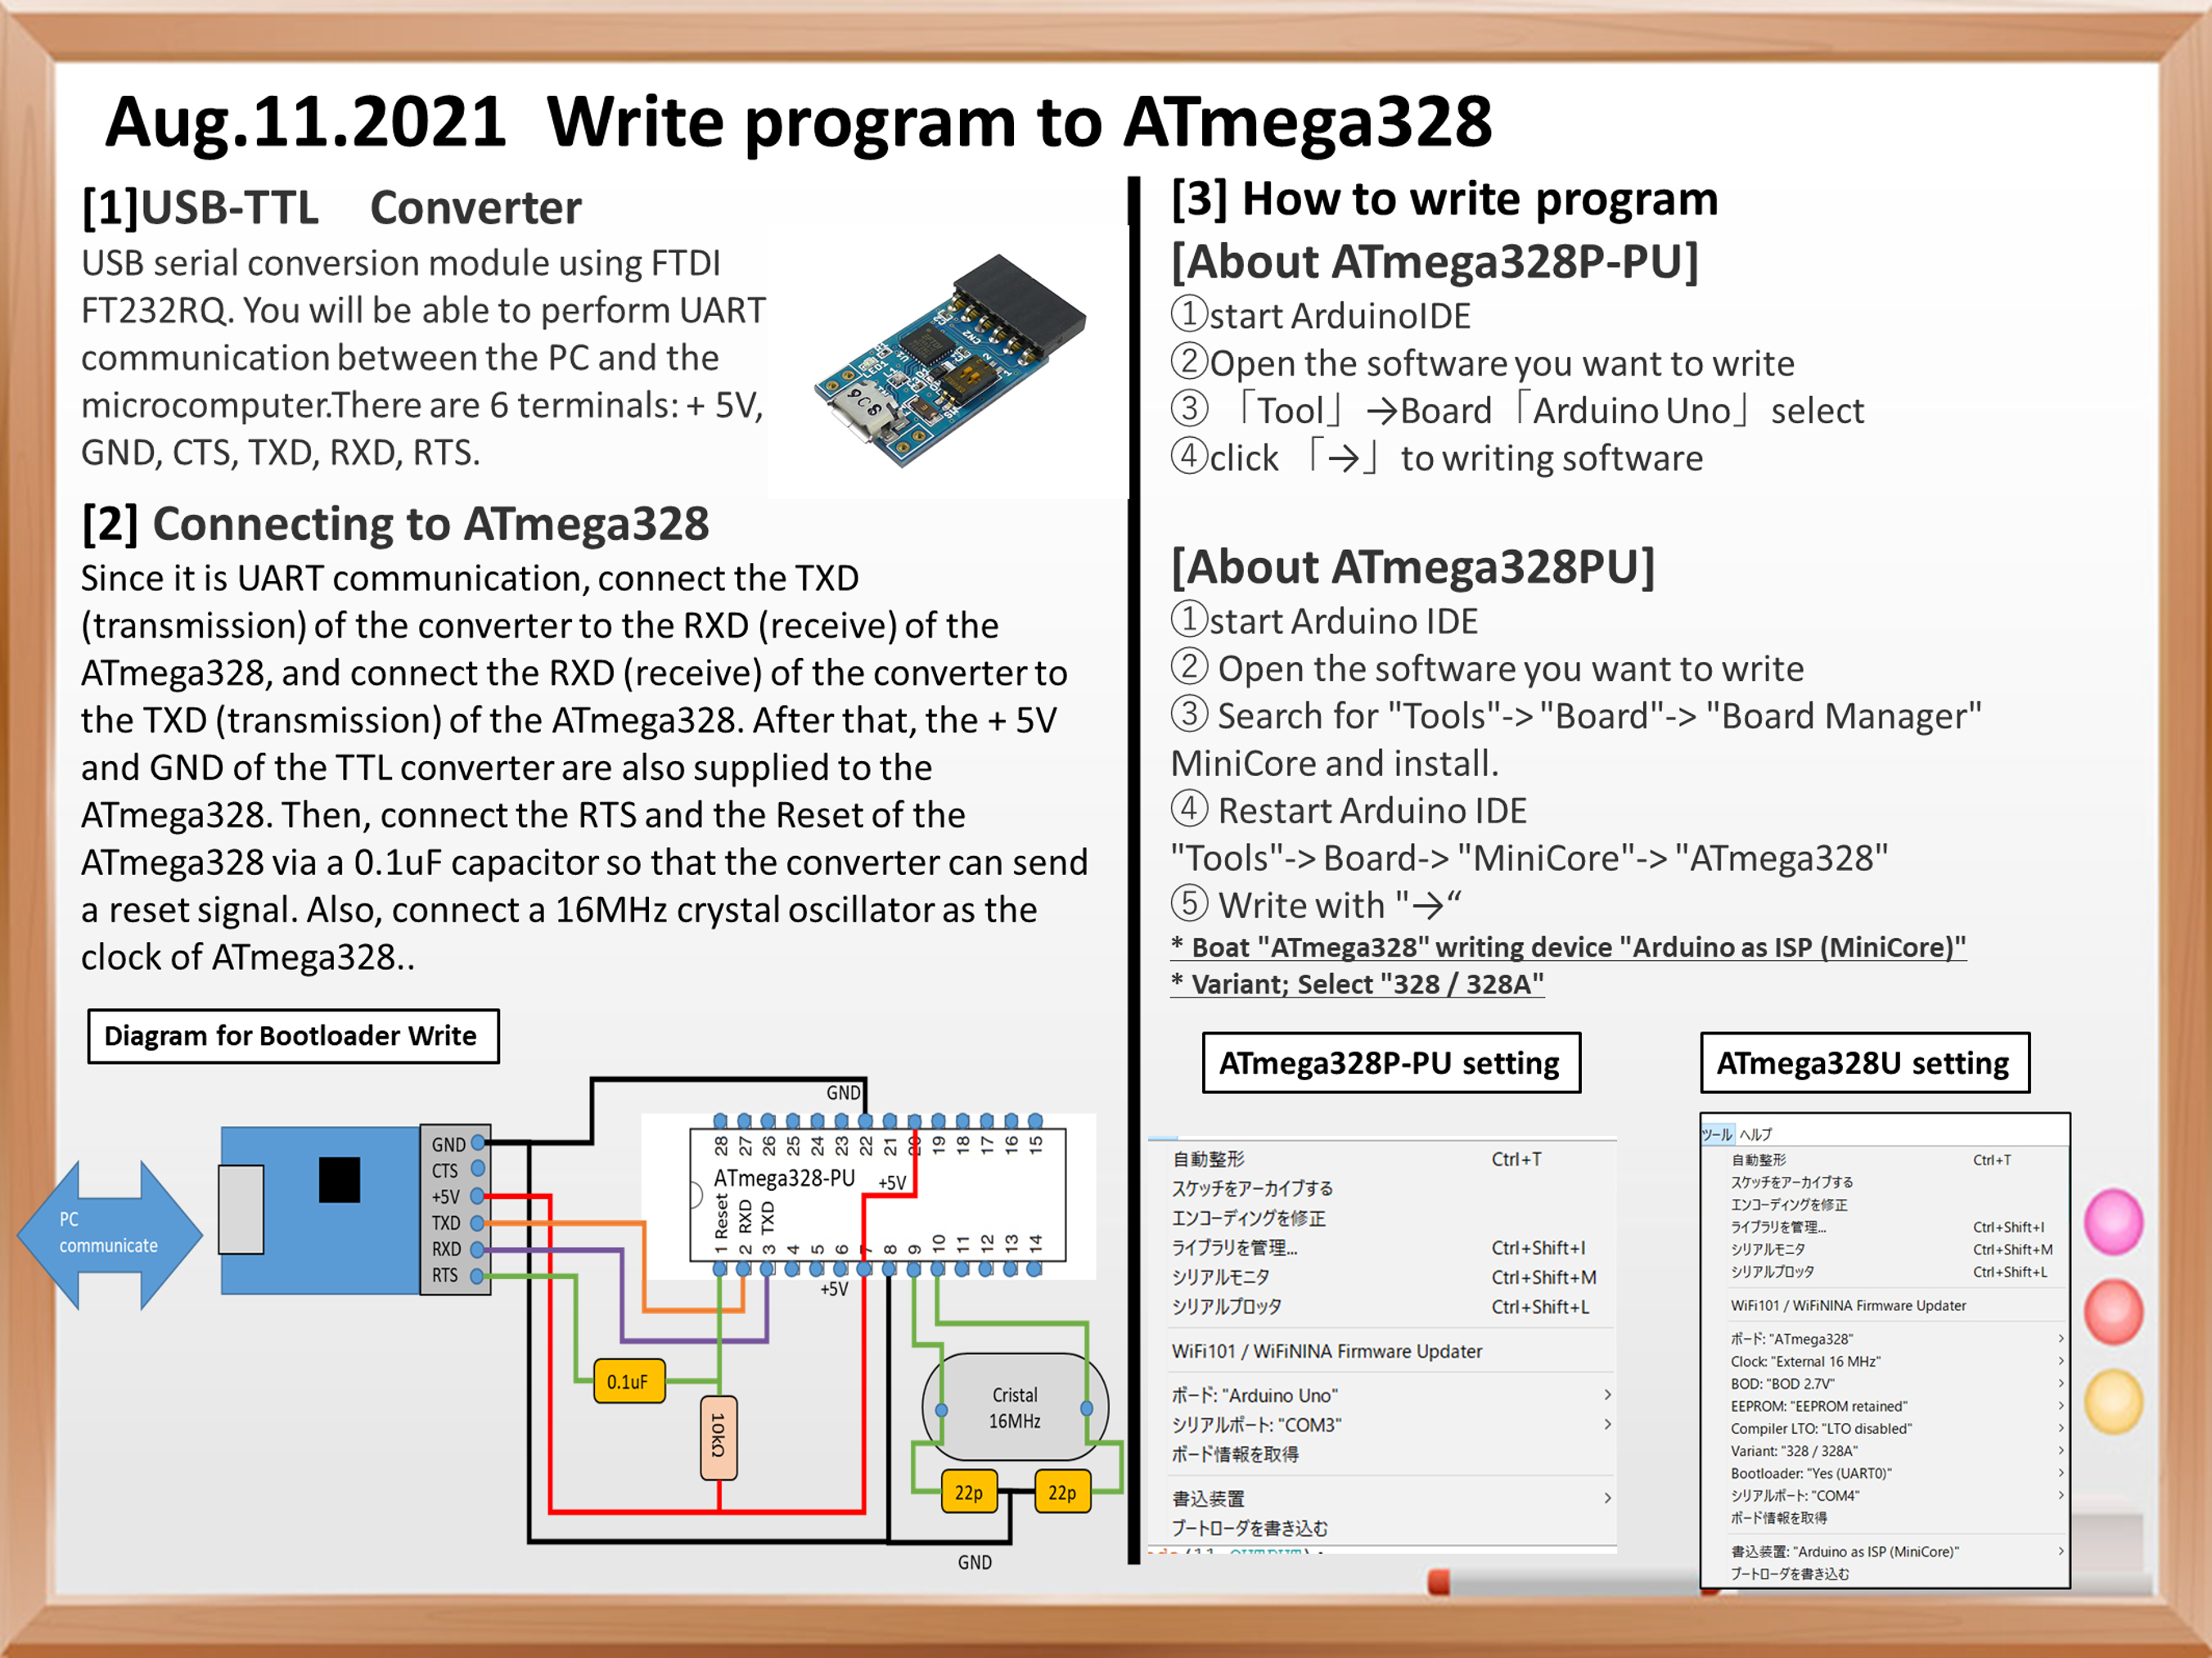
USB-TTL converter
USB serial conversion module using FTDI’s FT232RQ.
-A wide range of drivers are available from Windows XP to 10.
-The signal level of 5V / 3.3V can be changed with the DIP switch.
The terminals are + 5V, GND, CTS, TXD, RXD, and RTS.
TXD, RXD means that it is UART communication.
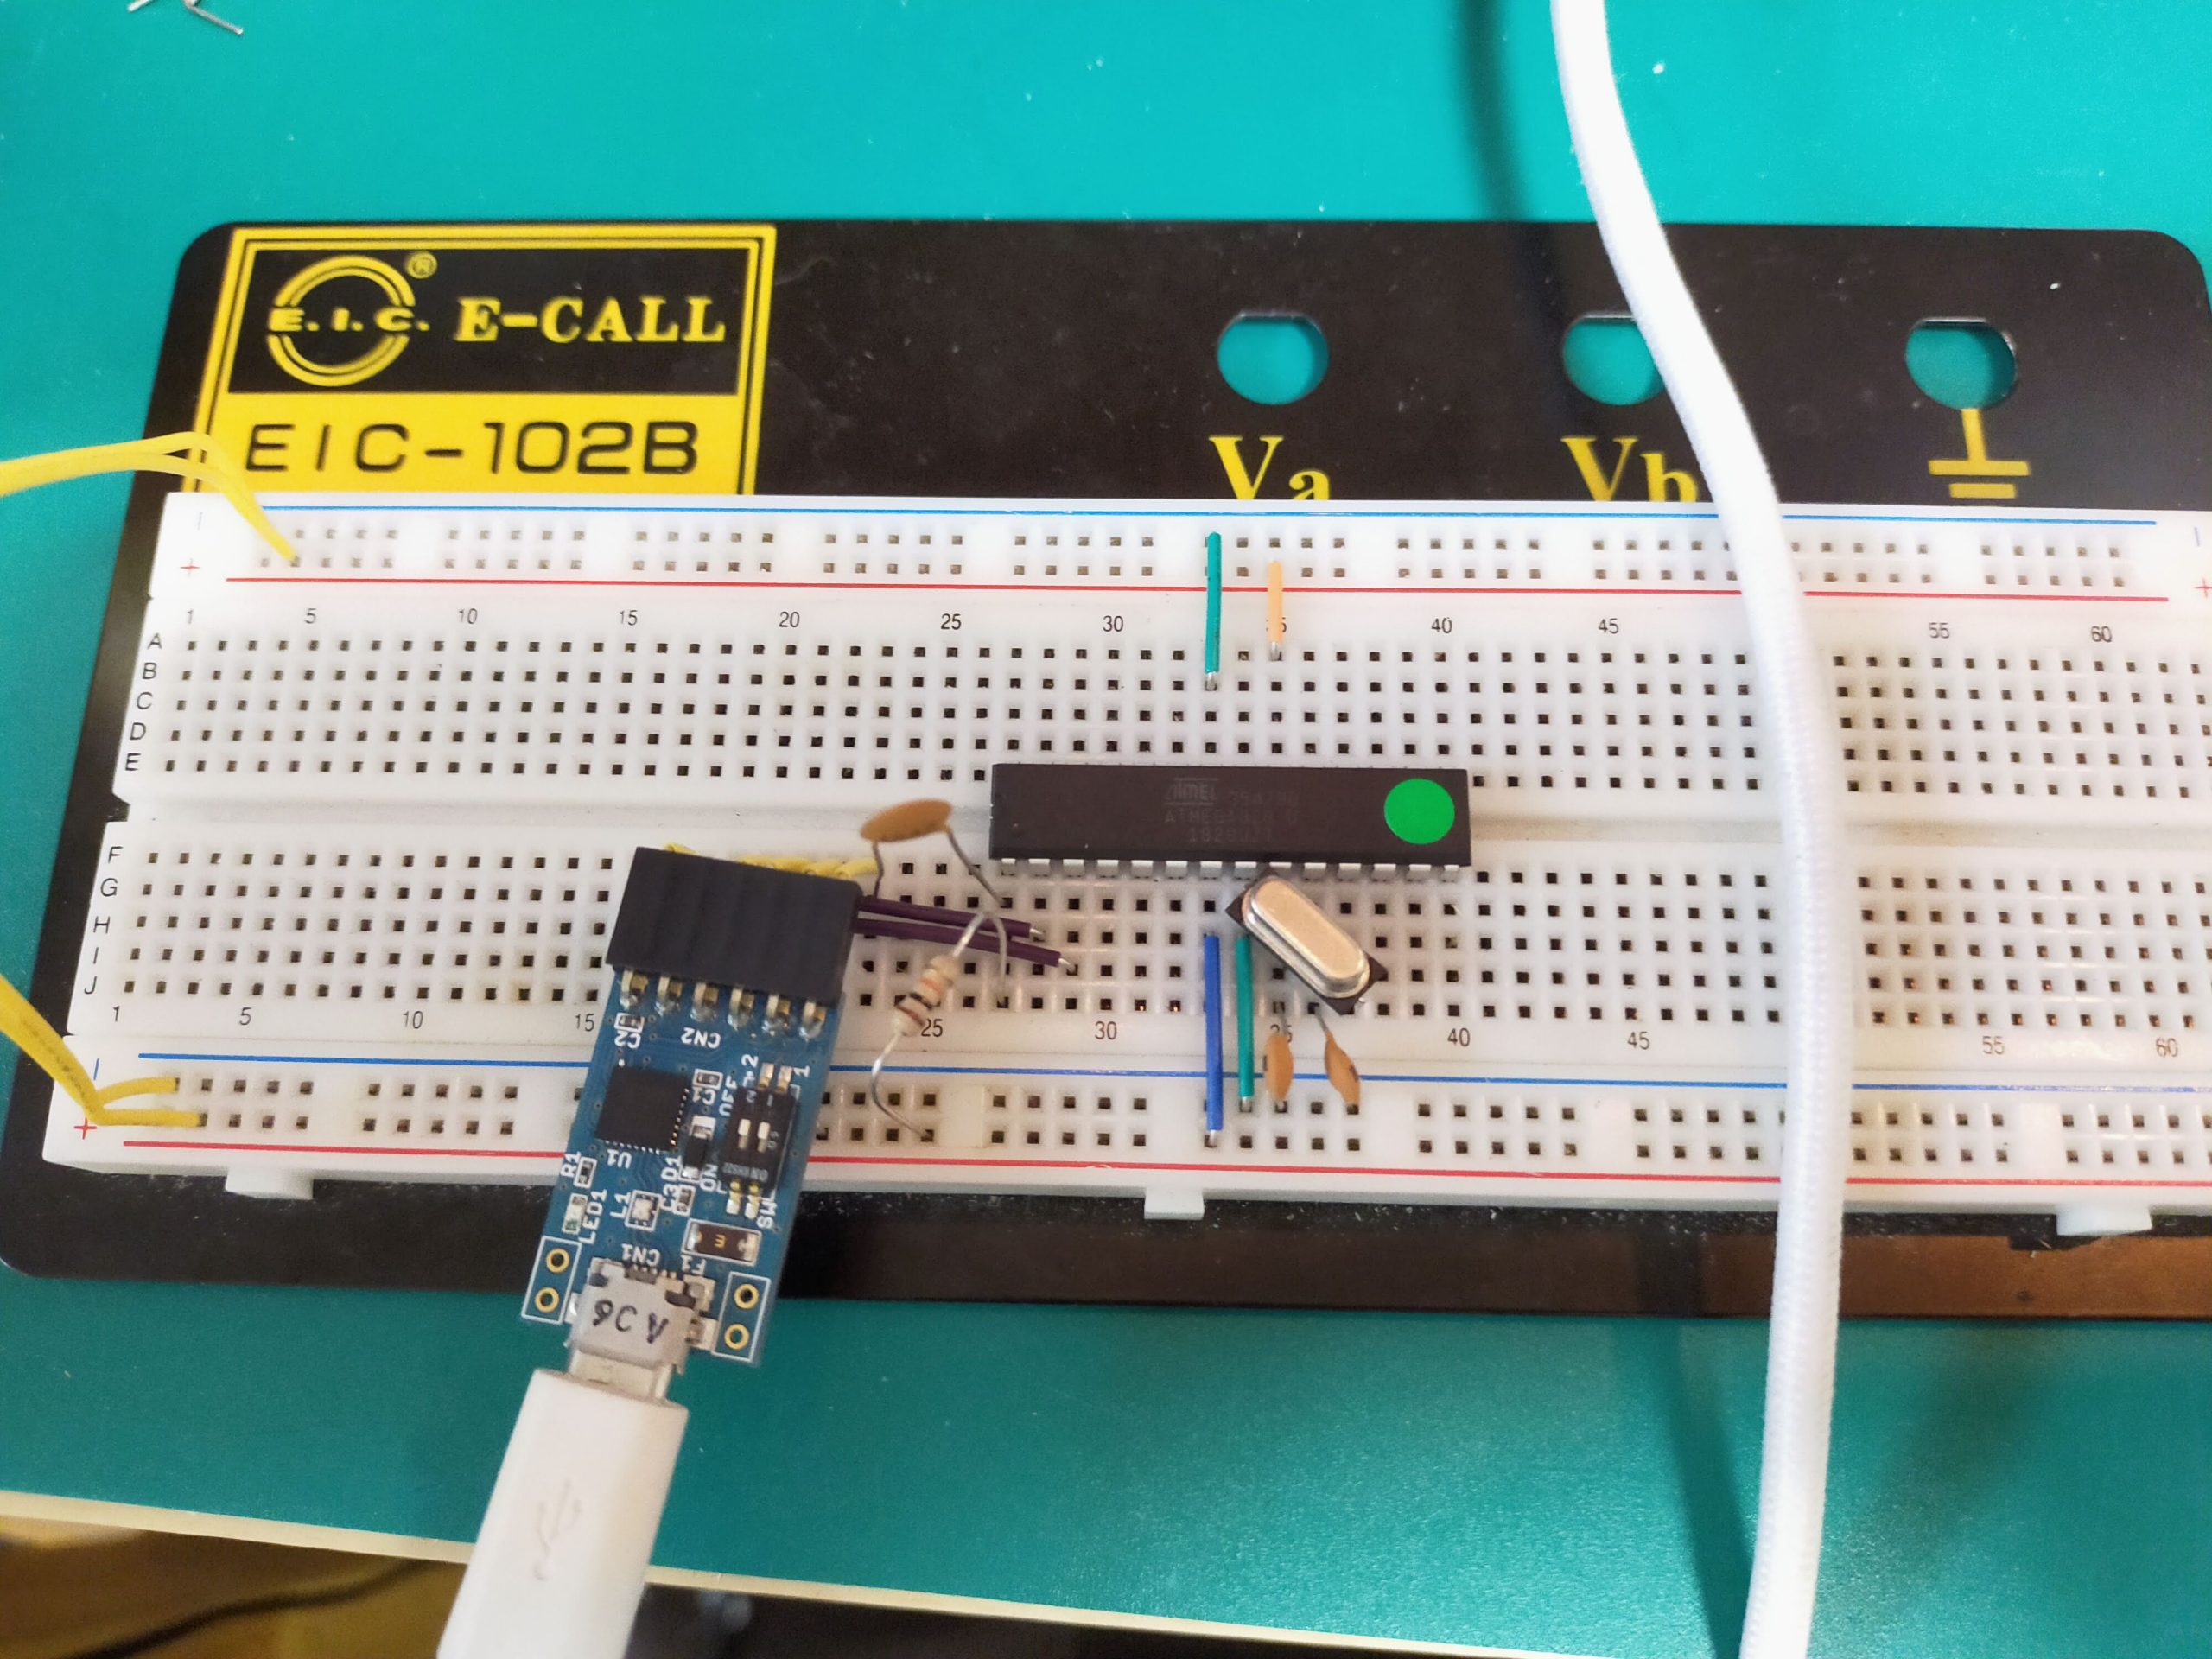
Connect to ATmega328
Next is how to connect with ATmega328.
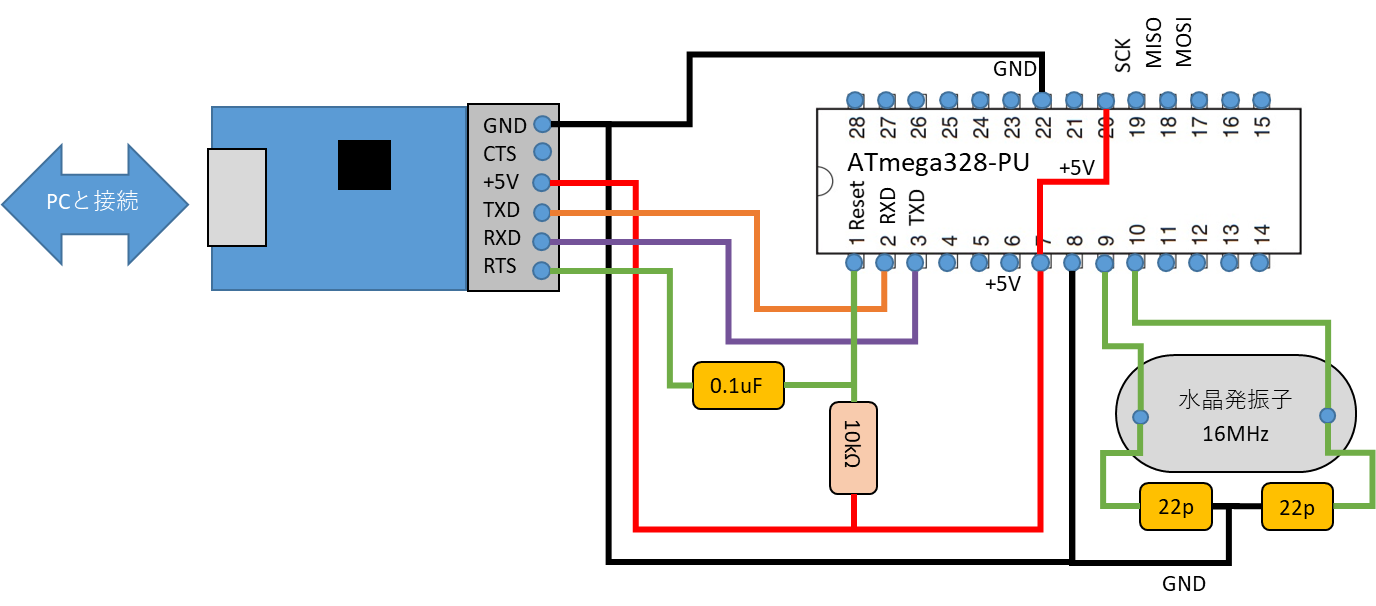
Since it is UART communication, connect the TXD (transmission) of the converter to the RXD (receive) of the ATmega328, and connect the RXD (receive) of the converter to the TXD (transmission) of the ATmega328. After that, the + 5V and GND of the TTL converter are also supplied to the ATmega328.
Then, connect the Reset of RTS and ATmega328 via a 0.1uF capacitor so that the converter can send a reset signal.
After that, connect a 16MHz crystal oscillator as the clock of ATmega328.
Arduino IDE settings
If you connect the TTL converter to USB, you can write like a normal Arduino.
However, you can write only to the microcomputer whose boot loader has already been written.
Please refer to the following for how to write the boot loader.
-Boot loader writing method
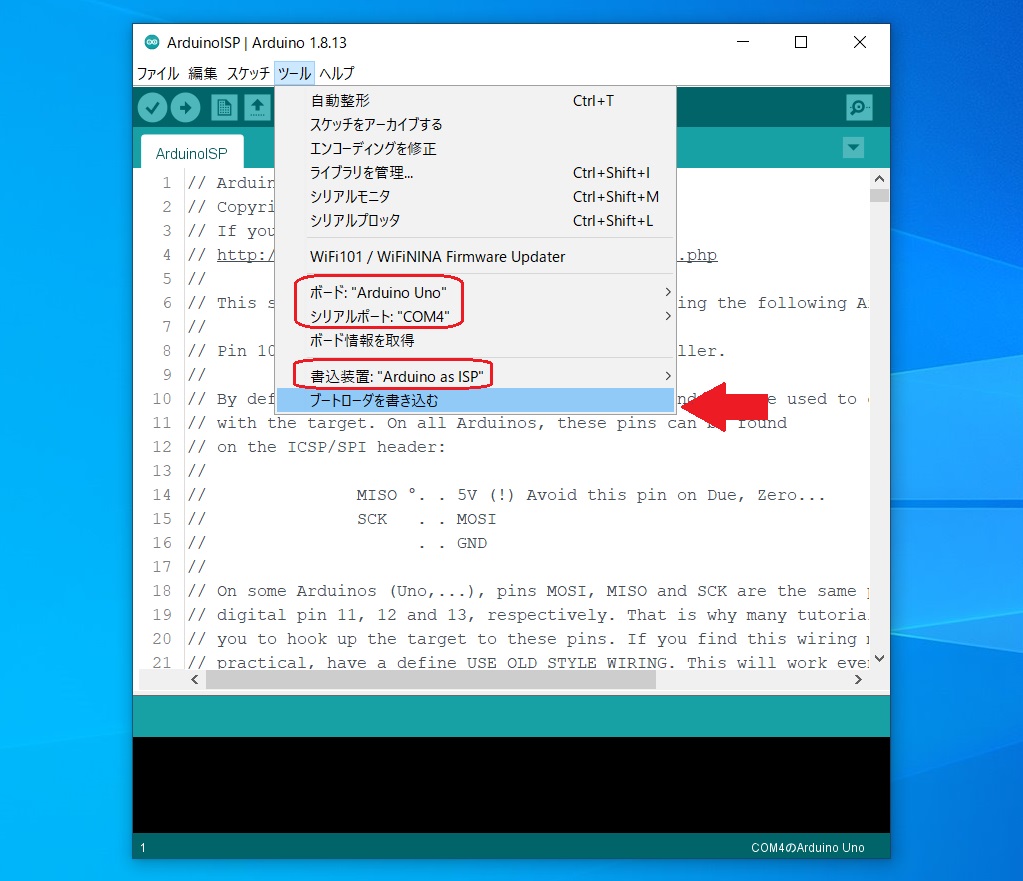
Well, although I said that I can write like Arduino, even with ATmega328, the settings are slightly different between ATmega328P-PU and ATmega328U.
ATmega328P-PU write settings
The ATmega328P-PU is a little expensive, but it uses the same chip as the genuine Arduino UNO, so on the setting screen that opens “Tools”, select the board “Arduino Uno” and connect the TTL converter. If you select the COM port you have, you can write to it.


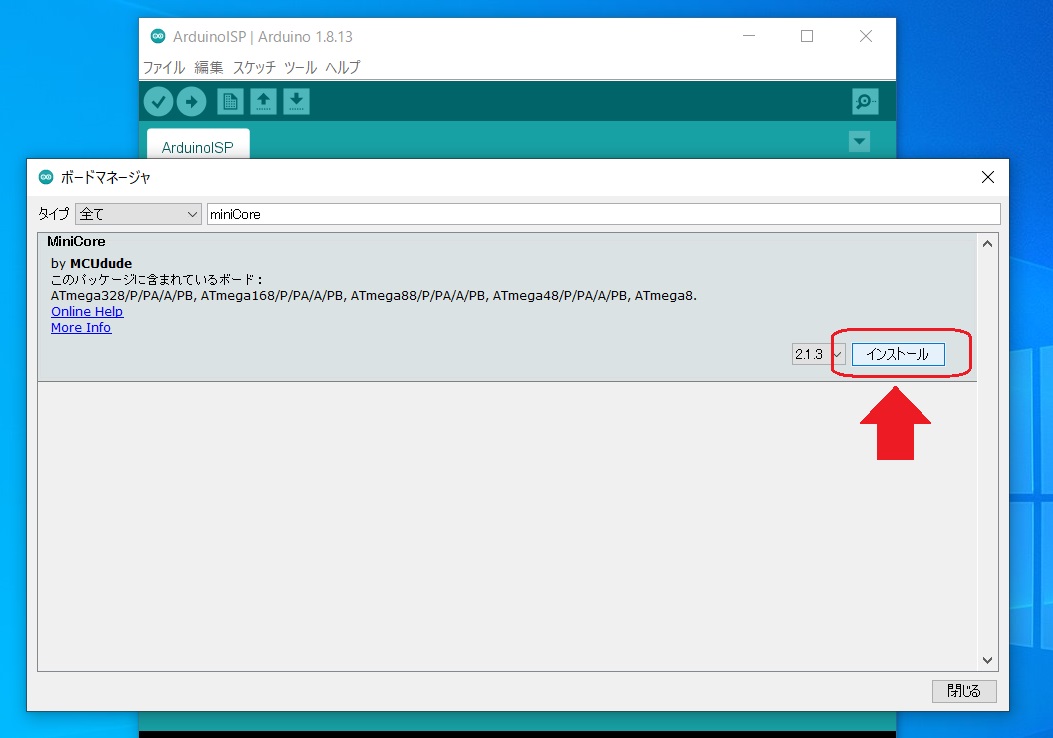
ATmega328 U(ATmega328PU)
ATmega328 cannot be written by the board manager that is included in Arduino from the beginning.
Open “Tools”-> “Board”-> “Board Manager”, search for MiniCore, and install.
Restart Arduino and select “Tools”-> Board-> “MiniCore”-> “ATmega328”.
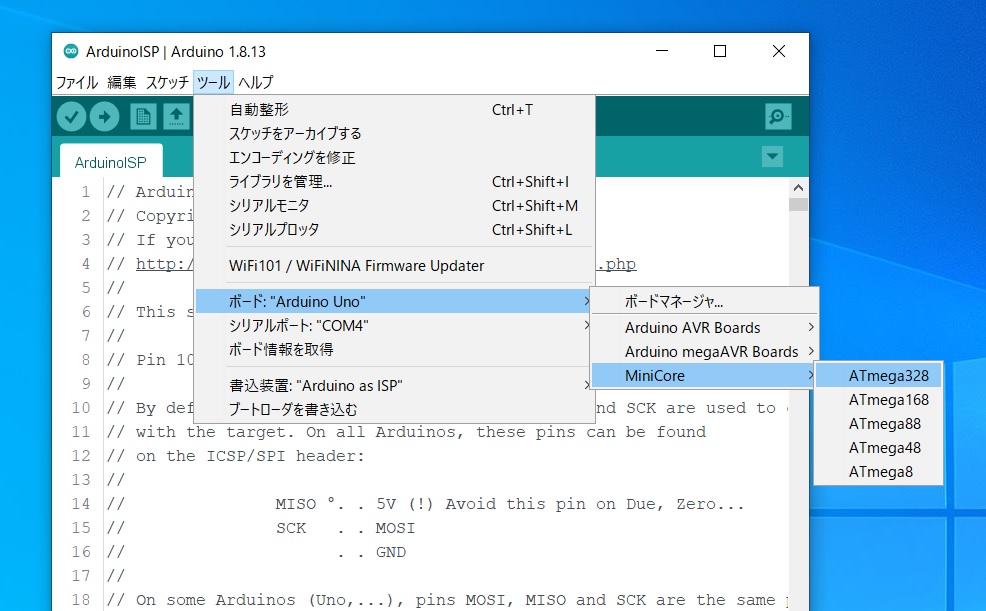
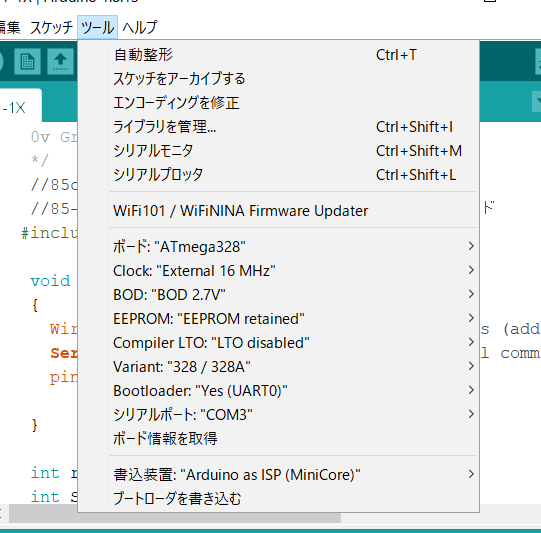
You can write with the include button.