
Suddenly, I want to make an instrument that can be played with ultrasonic waves.
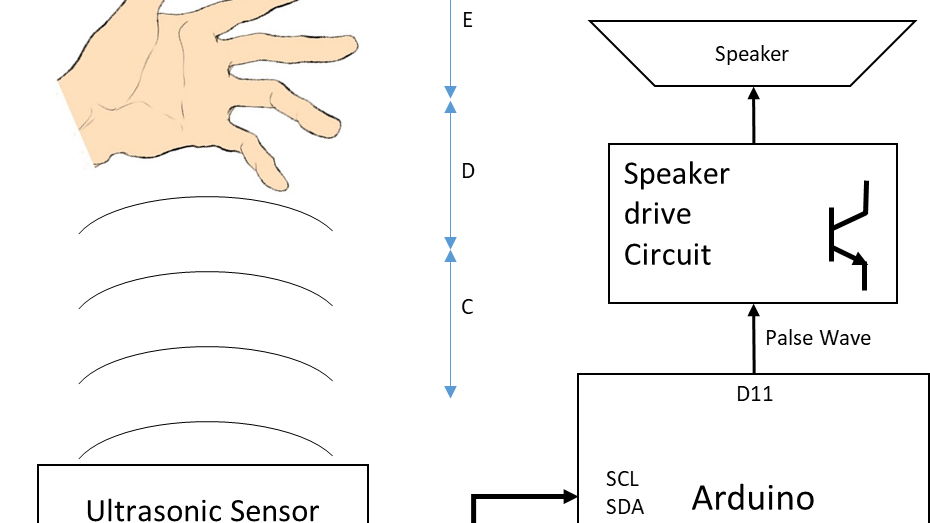
As shown in the figure on the right, the design image is to place the ultrasonic sensor facing up and hold your hand over it to play.
The scale is determined by the height of the hand you hold.
Next, consider the musical instrument system. The ultrasonic sensor uses SRF-02, which was introduced in the previous blog. Also, the circuit that outputs sound from the microcomputer uses the speaker drive circuit that I wrote in the previous blog.
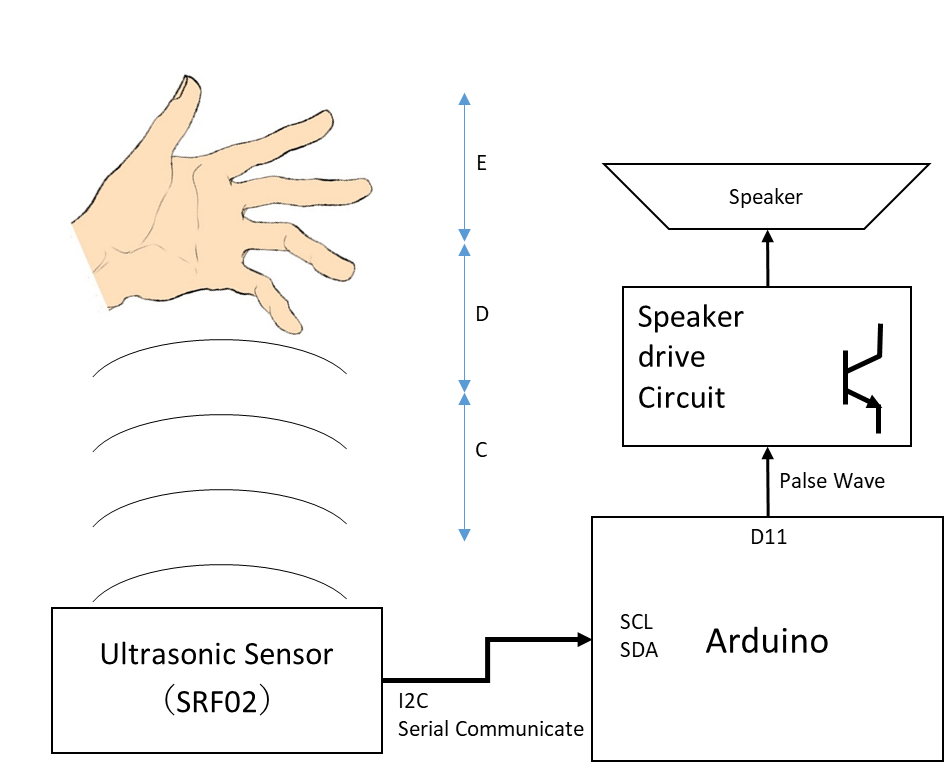
The figure on the right is a simple system diagram.
The ultrasonic sensor SRF02 outputs the detected distance via I2C serial communication or UART.
This time, I decided to use I2C, which is easy to wire.
The distance is numerically input from the ultrasonic sensor to the Arduino via I2C.
The numerical value is processed in Arduino, converted into sound scale data, and output to the speaker.
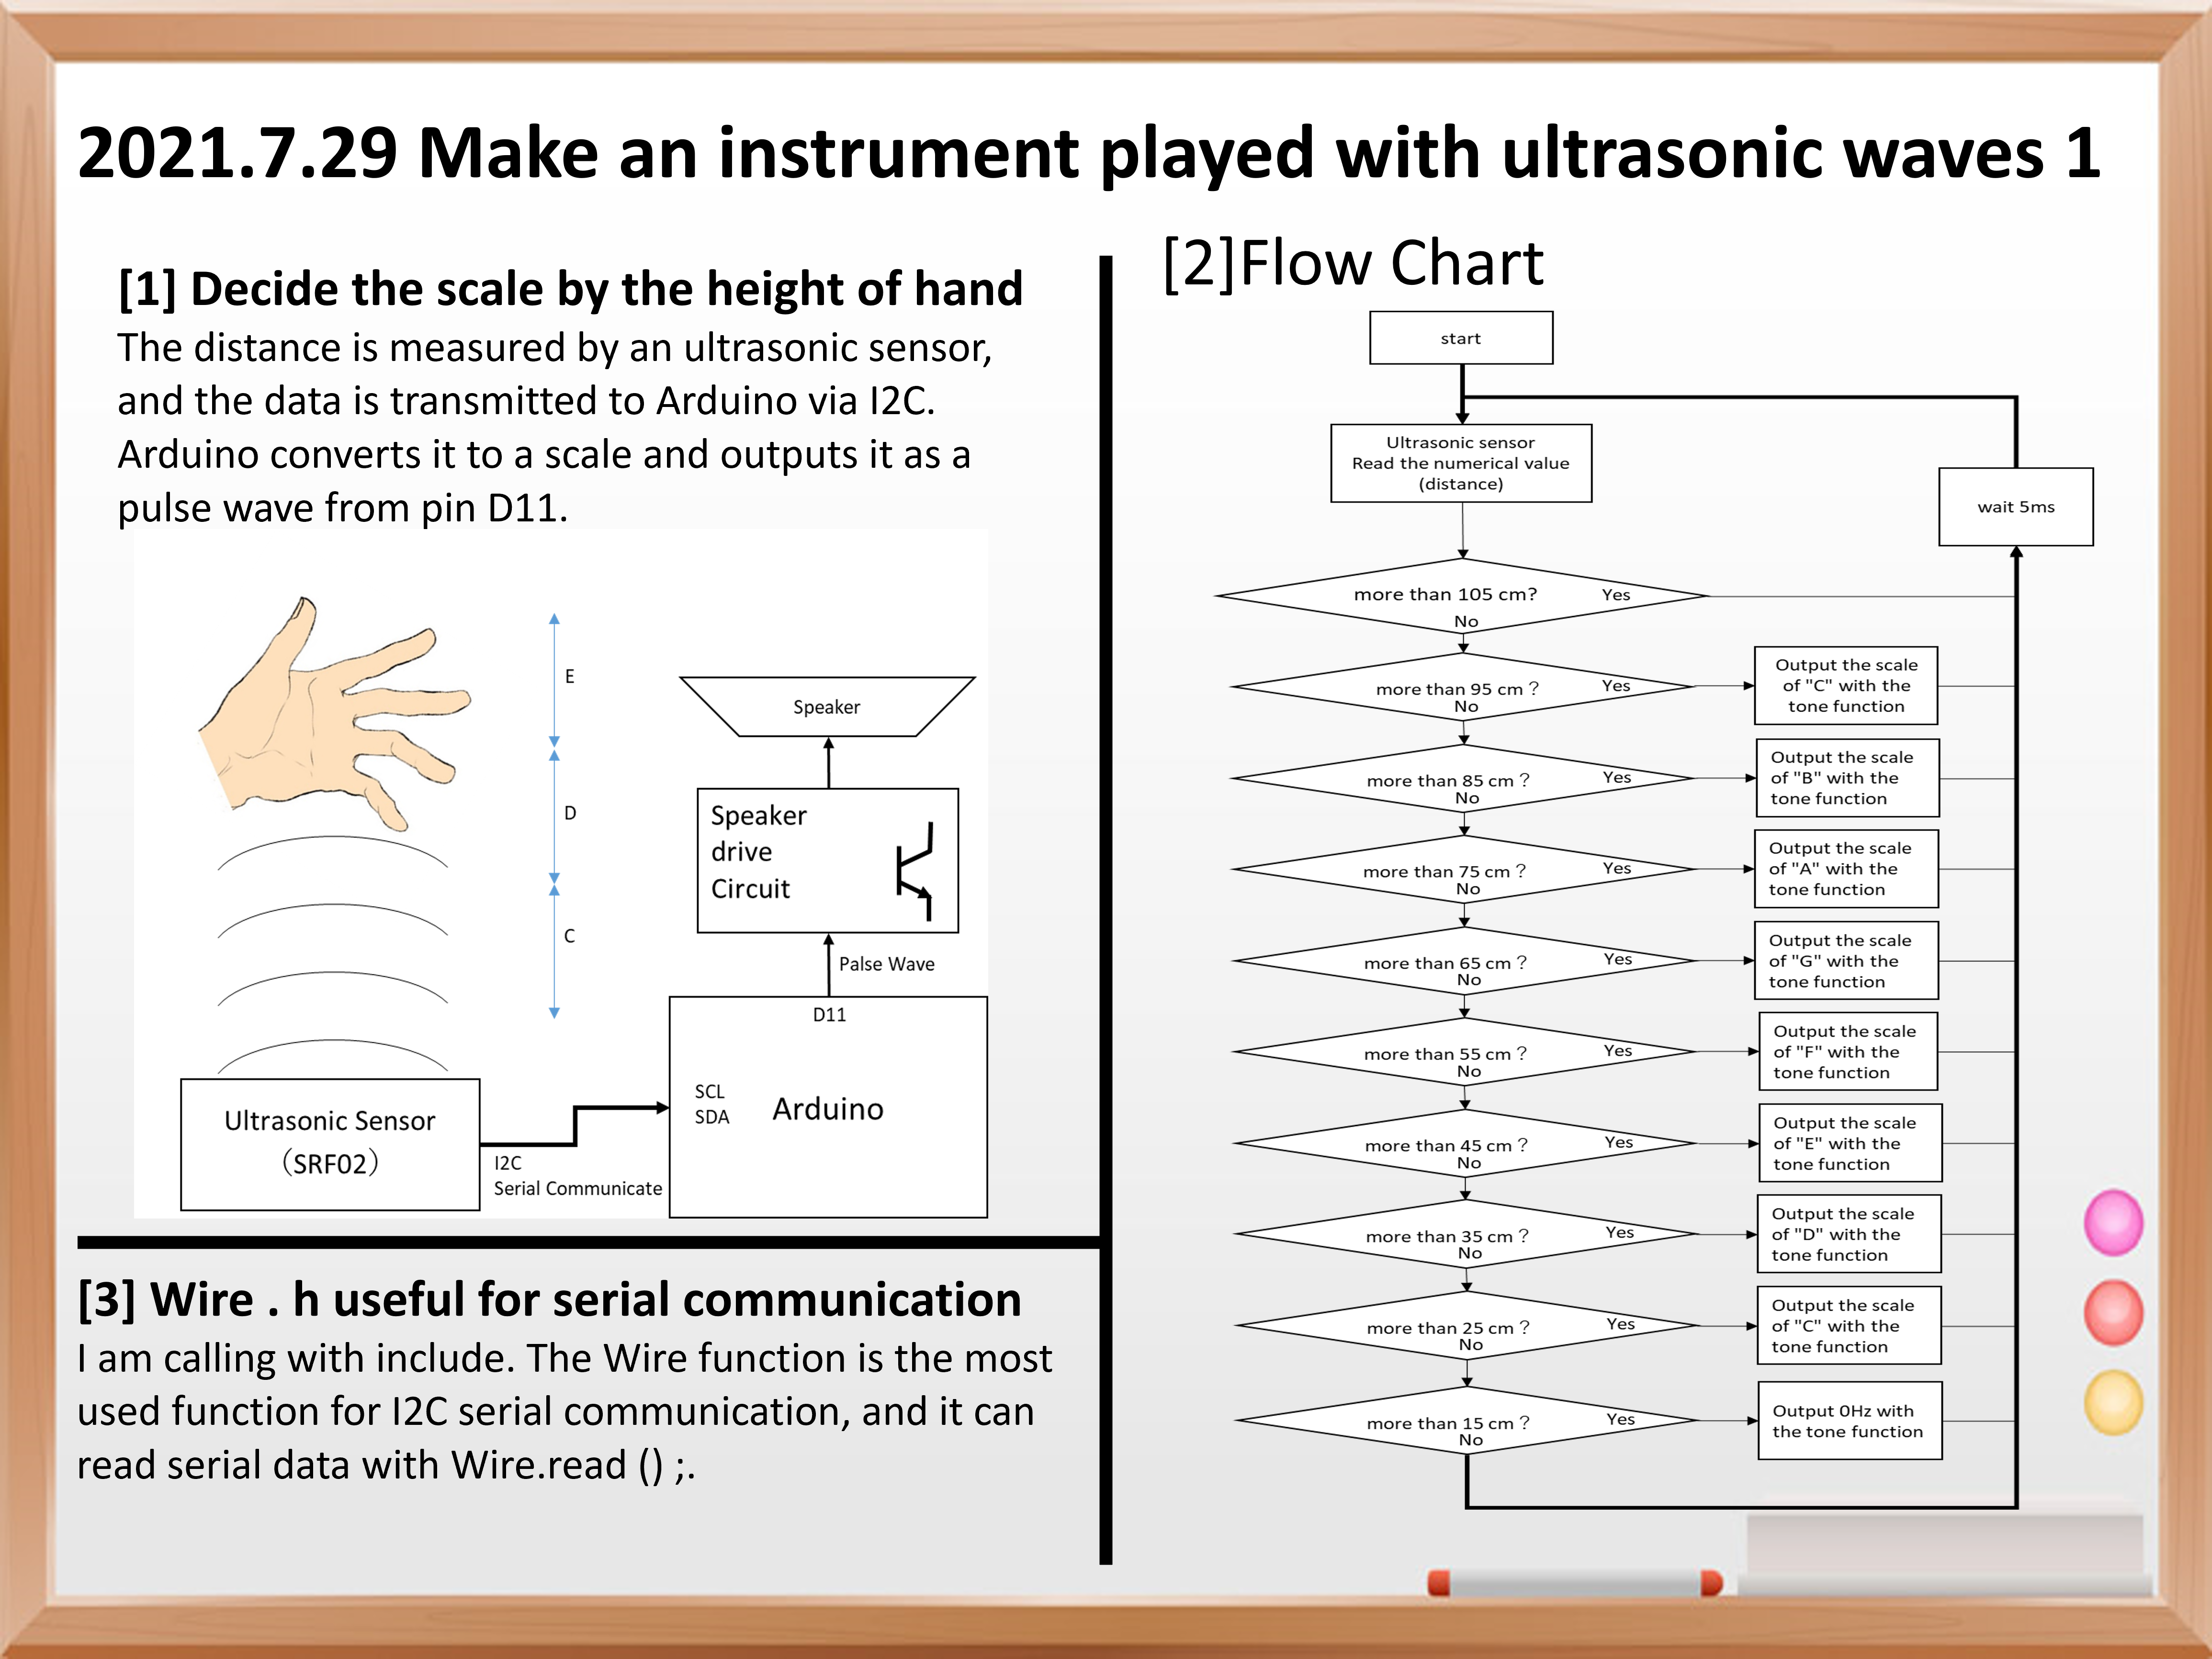
Next, I wrote a flowchart to design the program below.

When start the program, it first reads the value of the ultrasonic sensor.
The ultrasonic sensor then returns a number in centimeters of the distance to the hand you hold it over.
In Arduino, the condition is branched by an if statement that is layered on top of each other, and the frequency of each scale is assigned.
Next, the processing in the “if tatement” is explained.
First, determine if the height is 105 cm or more. If the height is 105 cm or more, the program and scale will be maintained as they are.
In other words, it continues the scale mentioned above. Since 105 cm is quite high, it is assumed that you are not holding it up.
Next, if 105 cm or more is No, the next step is to determine whether it is 95 cm or more. If it is 95 cm or more, it means that the hand is between 95 cm and 105 cm, so the scale of do is output.。
Then, if it is 85 cm or more, it branches to Shi, if it is 75 cm or more, it branches to La, and finally, if it is 15 cm or more, it becomes the lower do.
After outputting each scale, the process returns to the beginning and starts over from reading the sensor value.
If you convert this to the code of the program, it will be as follows.
  #include <Wire.h>

    void setup()
    {
      Wire.begin();                // join i2c bus (address optional for master)
      Serial.begin(9600);          // start serial communication at 9600bps
      pinMode(11,OUTPUT);
    }
    int reading = 0;
    int SPEAKER = 11;
    int TIME=100;
    int m[9]={262,294,330,349,392,440,494,524,0 };
    int melody=0;

    void loop()
    {
      // step 1: instruct sensor to read echoes
      Wire.beginTransmission(112); // transmit to device #112 (0x70)
      // the address specified in the datasheet is 224 (0xE0)
      // but i2c adressing uses the high 7 bits so it's 112
      Wire.write(byte(0x00));      // sets register pointer to the command register (0x00)
      Wire.write(byte(0x51));      // command sensor to measure in "centimeters" (0x51)
      // use 0x51 for centimeters
      // use 0x52 for ping microseconds
      Wire.endTransmission();      // stop transmitting
      // step 2: wait for readings to happen
      delay(20);                   // datasheet suggests at least 65 milliseconds
      // step 3: instruct sensor to return a particular echo reading
      Wire.beginTransmission(112); // transmit to device #112
      Wire.write(byte(0x02));      // sets register pointer to echo #1 register (0x02)
      Wire.endTransmission();      // stop transmitting
      // step 4: request reading from sensor
      Wire.requestFrom(112, 2);    // request 2 bytes from slave device #112
      // step 5: receive reading from sensor
      if (2 <= Wire.available())   // if two bytes were received
      {
        reading = Wire.read();  // receive high byte (overwrites previous reading)
        reading = reading << 8;    // shift high byte to be high 8 bits
        reading |= Wire.read(); // receive low byte as lower 8 bits
        Serial.print(reading);   // print the reading
        Serial.println("cm");

        if(reading>105){
        }else if(reading>95){
          melody=m[7];
          tone(11,melody) ;
          delay(TIME);
        }else if(reading>85){
         melody=m[6];
         tone(11,melody) ;
         delay(TIME);
        }else if(reading>75){
         melody=m[5];
        tone(11,melody) ;
         delay(TIME);
        }else if(reading>65){
          melody=m[4];
        tone(11,melody) ;
          delay(TIME);

        }else if(reading>55){
          melody=m[3];
        tone(11,melody) ;
          delay(TIME);

        }else if(reading>45){
          melody=m[2];
        tone(11,melody) ;
          delay(TIME);

        }else if(reading>35){
          melody=m[1];
        tone(11,melody) ;
          delay(TIME);

        }else if(reading>25){
          melody=m[0];
        tone(11,melody) ;
          delay(TIME);

        }else if(reading>15){
          melody=m[8];
          tone(11,melody) ;
          delay(TIME);
        }
        tone(11,melody) ;
      }
      delay(5);                  // wait a bit since people have to read the output :)
   }
Here, the new function is the wire function.
#include<Wire.h>
I am calling with include. The Wire function is the most used function for I2C serial communication, and it can read serial data with Wire.read () ;.
I didn’t know this function either, but it seems to be a little deeper, so I hope I can post it all together at a later date.
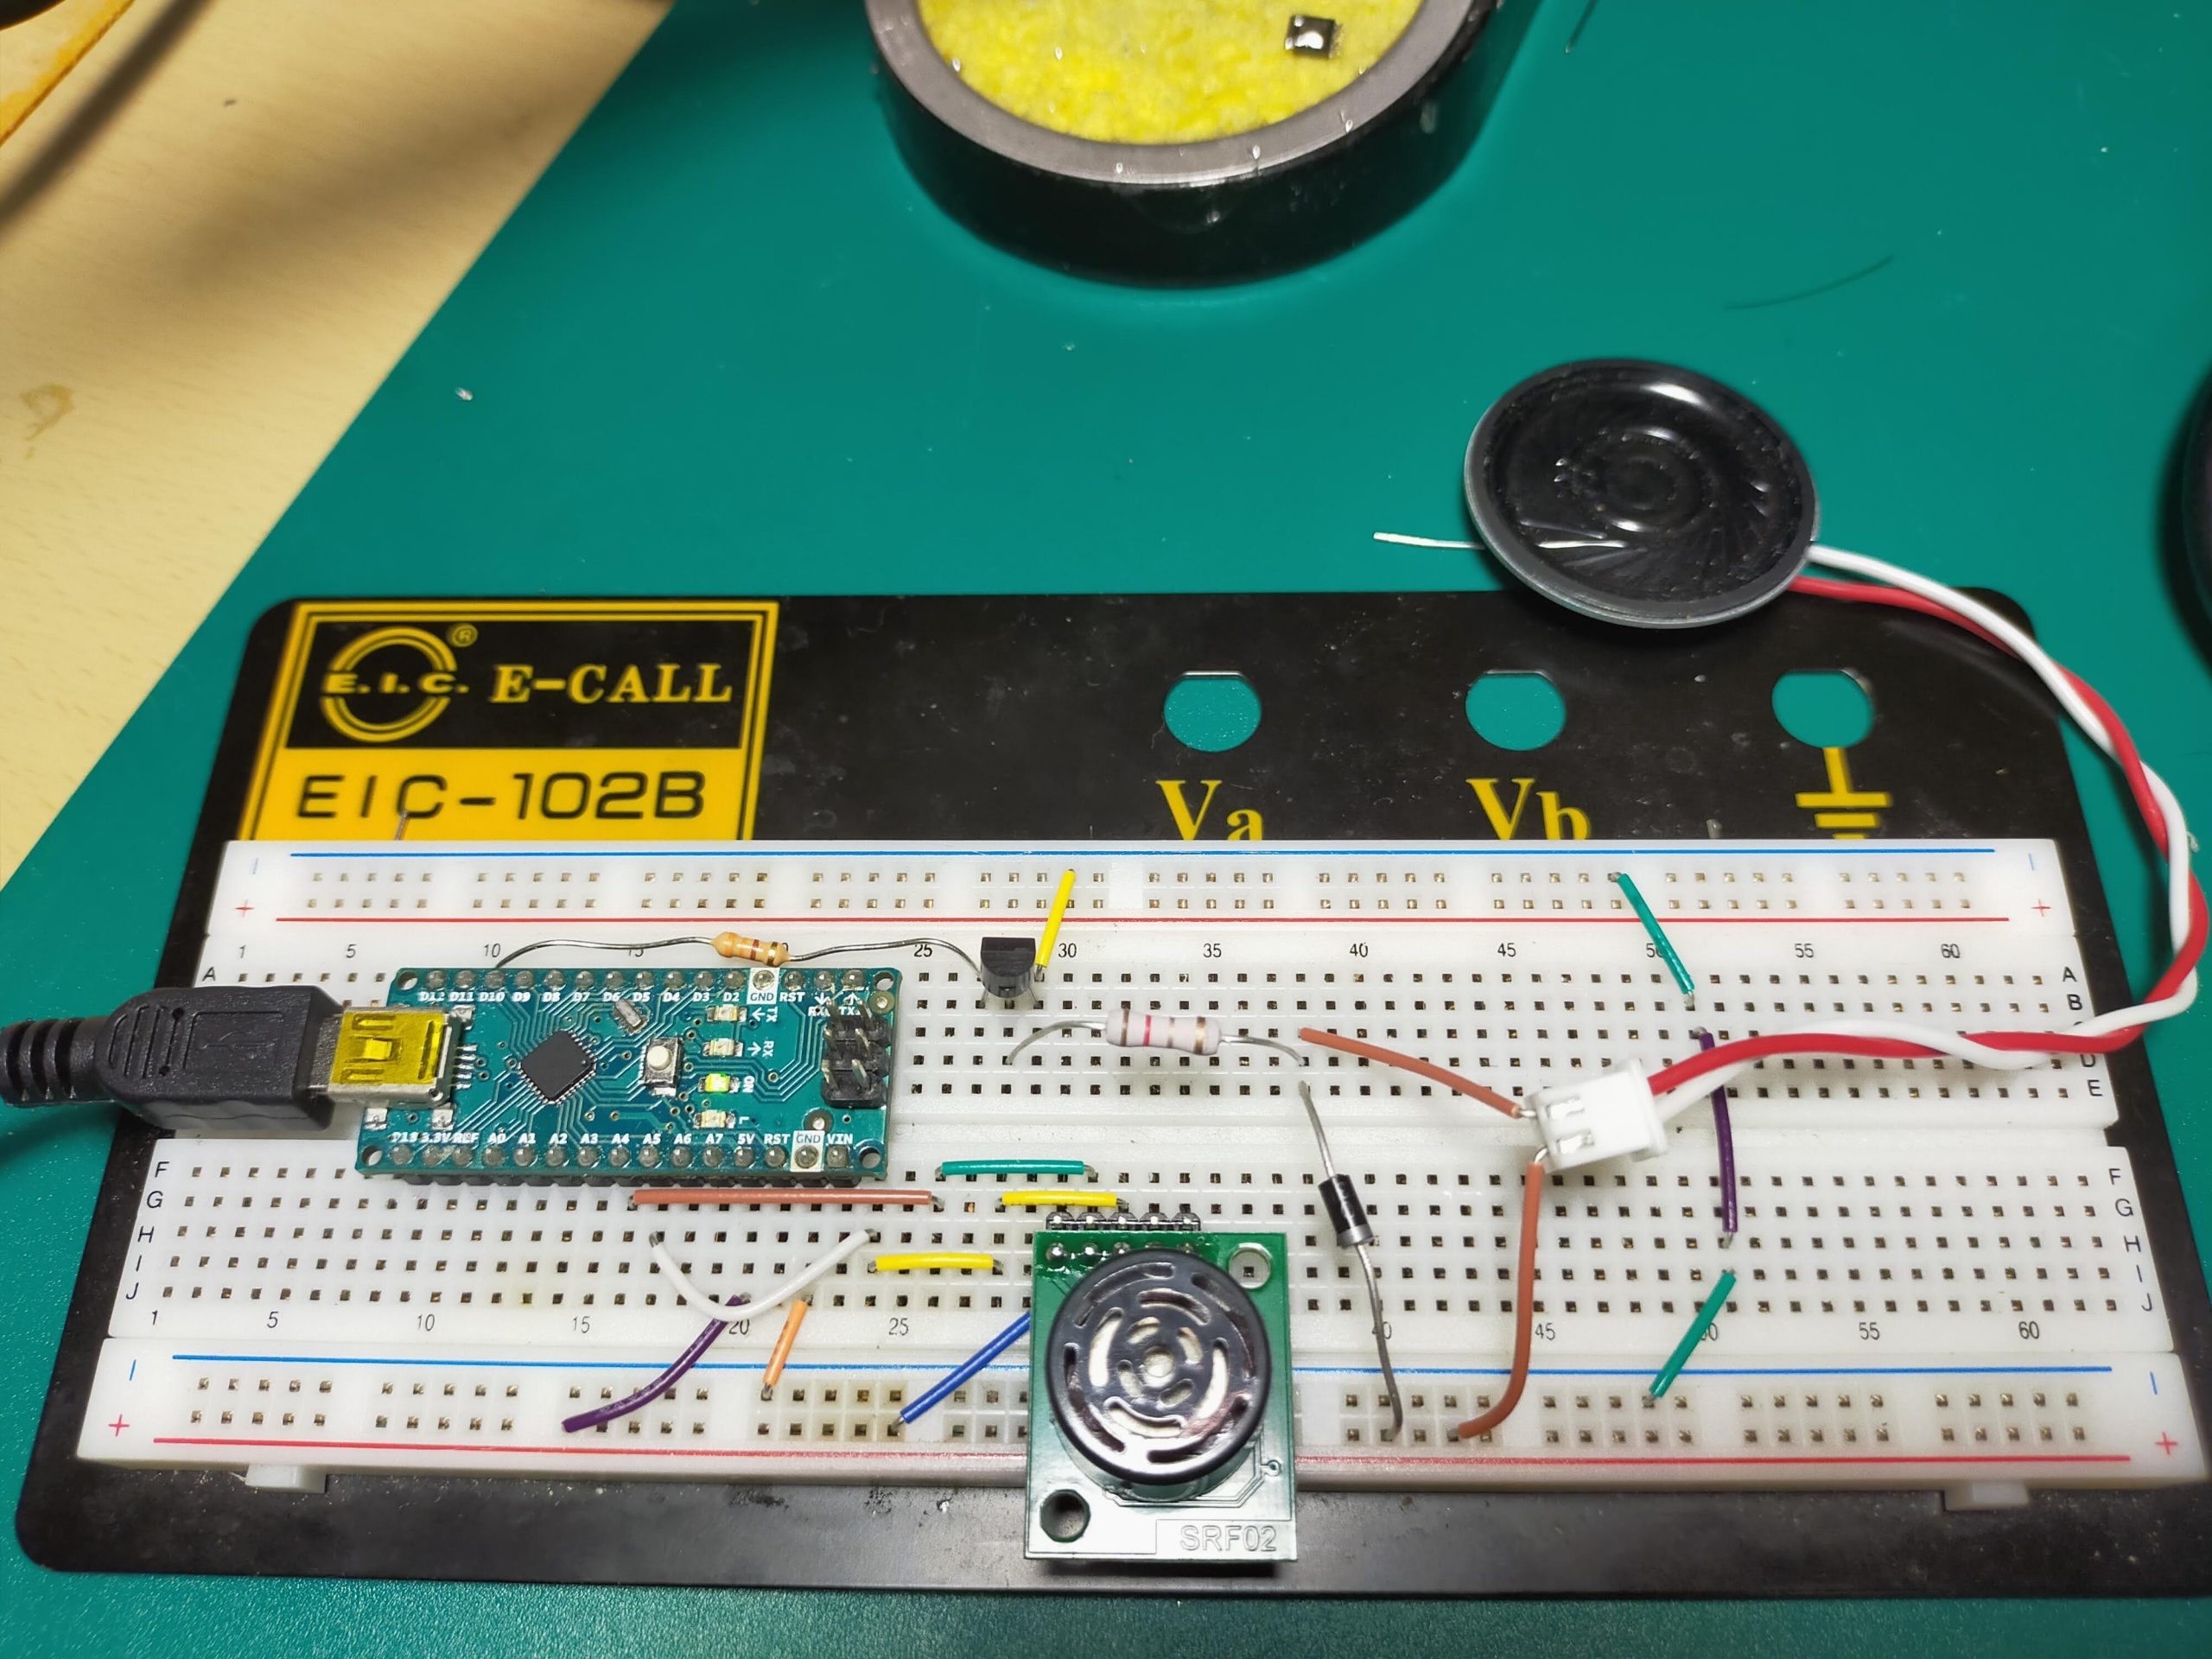
I assembled the wiring on the breadboard at once.
Next time, I will check the operation of this.
2021/7/29 Hiiragi